THE MILD ONES
Introduction
This is about gasbikes and gasbiking. It is a story of self expression. Of perseverance. Mechanical aptitude. Problem solving. Creativity. Dedication. Critical thinking. Self actualization and fulfillment. DIY-how to. Learning and growth. But MOST IMPORTANTLY..... FUN!!!!!!!!!!!!! :)
A gasbike is a lot of fun for not a lot of money. There is a little more maintenance for a gasbike than for just a regular bicycle. When you're pushing bicycles 30+ MPH and riding them for miles and miles more than they were ever intended to go, you should expect to have to check some things out every now and again.

A bicycle is a wonderful form of easy and cheap transportation.

The potential for a bicycle as cheap and convenient transportation is taken to the next level with the addition of an engine. The engines we have used are kits that come from the internet. There are many different ways of motorizing a bicycle. Using a 2 stroke internal combustion engine is one viable avenue for a very cheap, simple, reliable, compact and efficient motorized bike.

The fun level is also upped when motorizing a bicycle. Cruising with your friends or even by yourself is fun in each respect. People are mystified as you speed down the street at 30+ MPH on a bicycle.
While a gasbike will never be a replacement for a car, truck or motorcycle, with gas prices in excess of $3.00, the economical reasons for building a gasbike are obvious. Depending on how you ride, you can get roughly 75-100 mpg.

The gasbikes don't have to be insured, they don't have to be tagged, and you don't have to have a license to operate one. Laws vary from one area to the next, in general, from our research, gasbikes do NOT require: tags, insurance or a driver's license. Check your local laws before assuming anything as this may vary depending upon area.

Bolting an engine onto a bicycle is something that anyone can do, if they are willing to learn. If you have even moderate mechanical skills then you will certainly be able to build one of these machines. No mechanical skills? Fear Not! With a willingness to learn and possibly make a few mistakes through trial and error, ANYONE can really build one of these for a few hundred bucks.

While we don't have speedometers on our gasbikes, we have paced them against vehicles multiple times to ascertain speed. So far, the fastest gasbike in this group is the one below which has a top speed of about 35 MPH, depending on conditions. This gasbike has the most modifications and improvements as done by the owner pictured, me :)

The way a gasbike works is somewhat like a motorcycle. Somewhat. On a motorcycle you would twist the throttle and let the clutch out to take off from a stop. You cannot do this on a gasbike. A gasbike has a twist grip throttle and a clutch lever just like a motorcycle. However, a motorcycle generally has 4, 5 or even 6 gears in a transmission that is coupled to the engine. A gasbike doesn't have a transmission so there are no gears to shift. You have either, "on" or "off" depending on whether the clutch is engaged or not. In short, all this means, is that you have to pedal the gasbike for a couple seconds from a standstill before you let the clutch out to use engine power, no big deal at all. Having only 1 speed forces you to make some compromises.

A motorcycle obviously has a larger engine which will produce more power than one of these tiny 2 stroke engines. And having a transmission with multiple speeds behind that larger engine means that with the torque multiplication of 1st gear, all you have to do is rev the engine a bit and let the clutch out and away you go. You only have approximately 2 horsepower MAXIMUM for these china girl bicycle 2 stroke engines... Secondly, you do not have a transmission like a motorcycle. What the latter means is simple. Without a transmission, you do not have a range of gears to select from depending on vehicle speed, RPM etc to optimally connect the engine to the drive wheel. You can either engage, or disengage the clutch, that is all. With multiple speeds you could have enough torque multiplication to take off from a standstill like a motorcycle.

Okay.... What the fuck is a china girl??? The china girl is the generic term used on the internet for the engines that are in many of the 2 stroke gasbike engine kits. The engines and the entire kits are made in China.

The kits are really very cheap for the components that they include. And, even though the kits are Chinese and generally of mediocre quality at best, they are nonetheless, pretty cheap compared to a tagged automobile. With a little determination and skill, you can buy one of these inexpensive kits and work out the bugs. The components in the kit range from generally pretty decent, to terrible.... The engines have loose tolerances, but they will usually continue to work after hours of relentless thrashing including much wide open throttle. There have been plenty of wasted inner-tubes, disintegrated chains, exploded hubs, broken spokes, twisted coaster-brake arms and other carnage.

The gasbikes do require a certain amount of maintenance as compared to a regular bicycle, but that is to be expected when you are bolting an engine onto a bicycle that was never meant to go as far, as fast, as often.... It doesn't mean it cannot be done because it certainly can be done, but there are a certain amount of issues that need to be ironed out on each build in order to ensure safety and reliability. The black and silver bike pictured below are generally larger and beefier construction as compared to most bicycles. The wheels are a hefty 29" diameter so that they roll over bumps easily and smoothly. The larger diameter wheels and tires help with top end speed as well. A generally larger and beefier bicycle is a good place to start when motorizing a bicycle.

The inherent cheapness of the kits to motorize a bicycle are a double edged sword. One side being the really affordable nature of the entire kit as compared to some other similar alternatives. The downside however is that since the kits are so inexpensive, and they are made in China, the quality control can reasonably be expected to suffer. Nonetheless, still a good deal overall, as whatever idiosyncratic and specific issues that may arise on any particular incarnation of a gasbike build can be overcome relatively easily and cheaply.

These engines are two strokes and what that means is that they must have 2 stroke oil mixed into the gasoline as there is no other form of lubrication for the internal engine surfaces. There are 4 stroke engine kits on the market but they don't look as good in my opinion, and they certainly aren't as simple, lightweight etc. The two stroke engine requires a thoughtfully designed expansion chamber to really produce optimal performance. Expansion chambers will be discussed later on in a little more detail.

The gasbikes are two stroke engines, therefor requring the engine oil to be mixed into the gasoline. Interistngly, the instructions that come with many of the china girls will specify something like 16:1 for breakin and 20:1 for post-break-in. It seems that these specifications are for straight 30W oil or something that is NOT actually 2 stroke specific. With 2 stroke specific oil, you should be able to get by with less oil in your fuel/oil mixture. We break our engines in at about 24:1 and run that ratio through for 2 or 3 tanks to ensure the engine gets a nice and oily breakin. Using different quality 2 stroke specific oils, we have had very good results in running between 32:1 to 40:1 fuel:oil ratio after completing the break-in period. You should run whatver fuel.:oil ratio you're comfortable with, but something within that range ought to be fine. In warmer months, it might be wise to run a bit more oil vs the colder months. Oil is thicker when cold and conversely it is thinner when hot. When oil looses it's viscosity as a result of temperature and thermal breakdown, it also isn't able to lubricate moving parts as well.

The black bike that is mine has an untold thousands of miles on it in just over a year. Anytime you've got a wheel off for whatever reason, it would be a good idea to repack the wheel bearings with grease. Bicycles just weren't made to go as far and as fast so the bearings can take a beating sometimes. The larger wheels have larger bearings which does help.

If you find that you are having trouble keeping tubes in your gasbike there are a couple of solutions. I have been using the slime filled inner tubes with great success. Another trick for the inner tubes is to take an old one and cut it open. Then, stick your new tube inside of it. What this does is add a little cushioning effect to the tube by giving it a little extra rubber to soften the impacts of the road surface.

One thing that has plagued all of our gasbikes is the fuel tanks leaking. I highly reccommend taking your gastank and welding it up everywhere you can to prevent leaks BEFORE you put gas in it for the first time. Seams, mounting studs, pressed in filler neck tube, etc etc are all potential places for leaks.

Every gasbike is a little bit different. They almost have personalities in this sense. The starting procedure, handling characteristics, and ideal tuning may vary a bit. This is not bad, just partly a factor of the looser tolerances that these engines and kits are built to, and slight variations from one build to the next could be expected anyways.


MORE POWER!!
In this section, I will be showing and explaining some of the modifications and improvements to make your gasibke really move out better. The quality control on these engines is pretty sloppy. Even though they will run as is, and generally run pretty damn well, they can be made to perform even better. More than anything, you are correcting the sloppy, lack of quality control of the factories where these things are manufactured. Most of these mods are things you can do yourself with just a little time and some basic tools and mechanical know how.
Porting the "jug"
The "jug" is the cylinder, called a jug, b/c it kinda resembles one. There are no valves in a two stroke, only an intake port, exhaust port, and transfer ports. The transfer ports allow the fuel and oil mixture to reach to bottom end of the engine where there are bearings that require lubrication. A basic cleanup and slight porting on the ports in the jug can be quite beneficial. The idea behind porting is to clean up any imperfections in the ports. Radiusing any sharp edges is always good because sharp edges will impede airflow characteristics.

This is a shot looking into the exhaust port. You are trying to acheive basically the same thing on both the intake and exhaust ports. However, the exhaust port should be made as smooth as possible so as to promote efficient scavenging of burnt exhaust gases. And conversely, the intake port should be left with a somewhat rough texture. The intake port needs a rougher finish on the port walls themselves in order to promote a little turbulence in the incoming air. This small amount of turbulence is actually a good thing and here is why... The turbulence basically swirls the fuel around such that the air and fuel become more atomized, thereby promoting the most efficient combustion. Remove any burrs or imperfections that may be inside the ports. Polish the exhaust port best you can, and leave the intake a little rough (see above).

The same story goes for the transfer ports in the bottom of the jug. The transfer ports are what allow the incoming air/fuel mixture to lubricate the bottom end of the engine itself. It's difficult to manipulate the transfer ports so what I usually do is just lightly break the sharp angle on the borrom perimiter of the transfer port as shown here. Remove any trash in the casting as best you can. Don't sweat this area too much, just get what you can.

The gaskets that come with the engines seem to work OK. But, if you pull the jug then you should go purchase some gasket material and cut out your own. The gasket material that comes on the engines from the factory seems to usually work, but it's never been reusable in our experience. High temperature RTV will also be a good idea here. Not absolutely necessary, but I highly recommend it. Use your old gasket as a tempelate if you can, or, you can use a piece of paper to transfer the gasket surface of the bottom of the jug to the paper itself. Then transfer that to the gasket material.
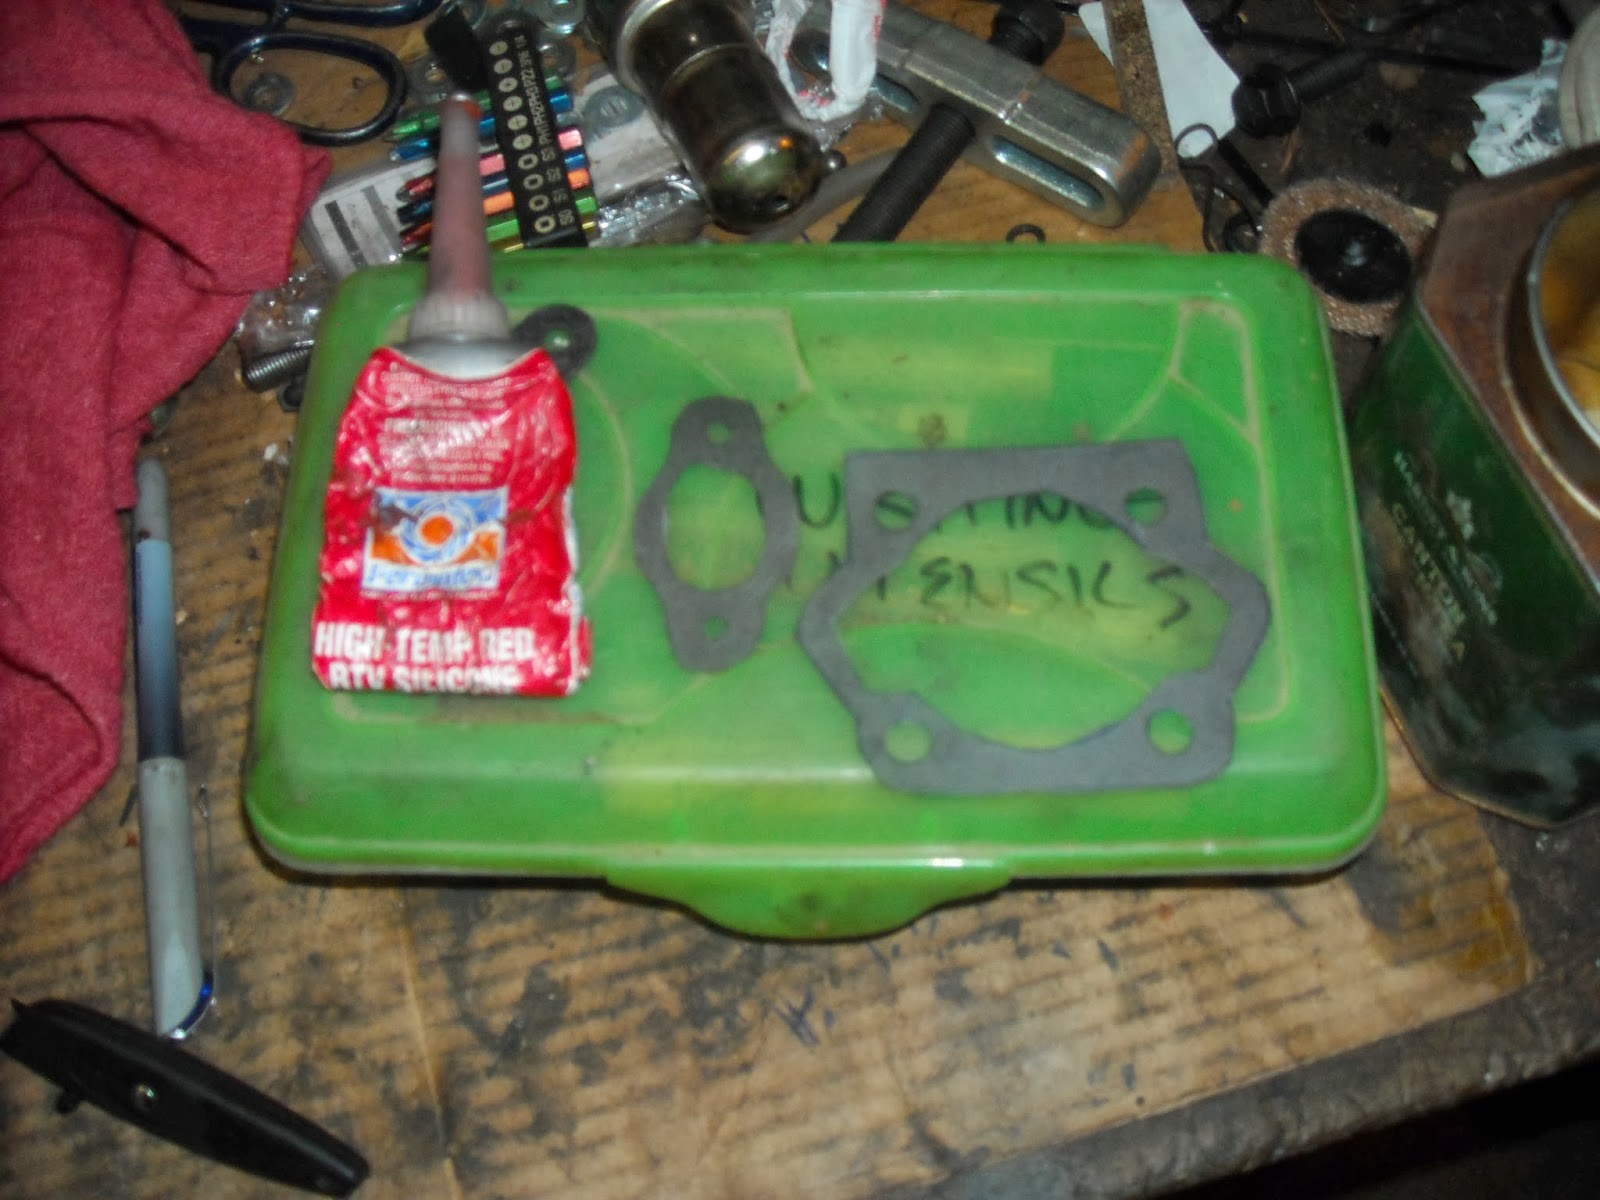


High temp RTV is what the orange stuff is. I have applied it in conjunction with a paper gasket that I cut out. The RTV is probably overkill, but I have used this stuff in many hot areas with great success so I prefer to use it whenever I can for a little extra sealing ability over just a gasket by itself. This is especially important in this case because if you have a leak at this gasket surface where the jug meets the block, your engine won't run at all, or won't run very well.

For a larger diameter down tube like on our bikes and many of the bigger bicycles on the market, a mount like this or similar is the best to use. I struggled with another variation on a front engine mount before this, but came to find this setup pictured to be the most reliable and best way for bolting the front of the engine to the bike frame.

This is more of an aesthetic thing but this picture shows how I trimmed the plastic cover down to just what is needed. Before I did that, there were a bunch of extra plastic tabs that were not only unnecessary, but kinda blocky and stupid looking.

The factory aircleaner assembly isn't the greatest in terms of it's ability to filter incoming air AND allow good airflow. One quick and easy way to fix this is to simply drill a large hole in the plastic cover, right over where the carburetor throat begins. Doing this will still pass the air over the filter-foam, but, it allows air to come straight into the carburetor instead of having to fight it's way around tight bends and curves in the plastic cover. Air is like water in that every turn and restriction and bend you make is ultimately going to hurt your overall flow potential as compared to totally uninhibited flow. A stepped drill bit works nice to do this mod, just keep drilling until the hole in the plastic cover matches the hole of the carb throat.

This is a little tidbit that is so simple yet so ingenious. Credit to Paul for this idea. The clutch has a stop on it so that you may "lock" the clutch in the disengaged position for coasting or whatever. Then, when you wan to rengage the clutch just pull the lever and relase and you're motoring along again. When you pull the clutch to release the "lock", the metal pin show in the picture will slide up and make a very annoying "tink!" metallic kinda sound. We double up an O-ring and slid it on the pin as the picture shows and it silences that annoying "tink!" sound. Good deal!!!
